Using Jira for Risk Management: 8 Best Practices For 2024
When it comes to managing risks in project management, using Jira for risk management can significantly improve your team’s productivity and effectiveness.
Risk management involves identifying, assessing, and prioritizing risks to minimize their impact.
With Jira’s flexible tools and plugins, you can streamline this process making it easier to keep track of potential issues and mitigate them before they derail your projects.

Jira offers features like Kanban boards and Gantt charts that help visualize and address your project tasks. These tools allow project managers to create filters, set up dashboards, and manage work efficiently.
By leveraging Jira, you can enhance team collaboration and ensure transparent communication including those about risks.
The real power of Jira lies in its ability to adapt to your needs. Whether you’re dealing with compliance issues or trying to maintain control across multiple projects, Jira’s project management capabilities can help you stay ahead of any potential problems.
Knowing how to set up and use these tools and their risk management plugins effectively can make all the difference in your project’s success.
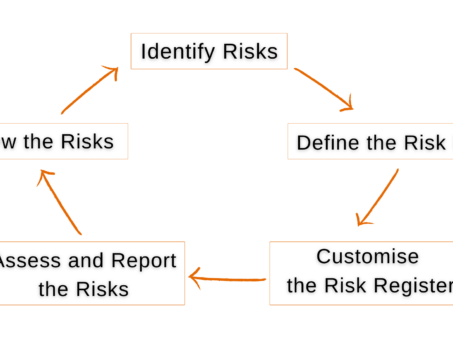
Main Principles of Risk Management in Projects
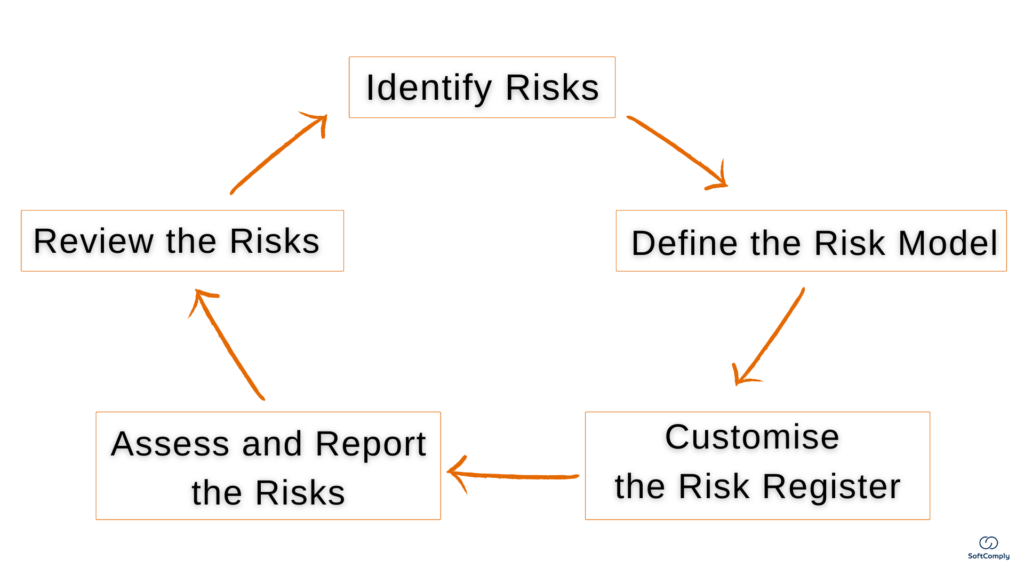
In project management, understanding risks is crucial. It’s key to know what risks are and how they impact your projects. Additionally, project managers play a vital role in handling these risks.
Defining a Risk and Its Impact on Projects
A risk is anything that could go wrong and affect your project. It could be something like missing deadlines, going over budget, or technical issues popping up. These risks can cause delays, increase costs, or even lead to project failure.
Most importantly, managing risk means identifying potential problems before they happen. This proactive approach helps teams to be prepared. For example, if there’s a risk of running out of resources, having a plan B can keep the project on track.
The Role of a Project Manager in Risk Management
As a project manager, your job is to spot these risks and figure out how to handle them. You must start by creating a risk register to track each risk. This includes documenting things like the likelihood of the risk and its potential impact.
You will also need to prioritize risks by their severity. High-impact risks get more attention and resources. It’s also important to involve the whole team in this process. Everyone should know what the risks are and how to deal with them.
Jira as a Risk Management Tool
If you are using Jira for project management already, you should use this also for the risk management process. When it comes to managing risks, Jira offers a robust platform with various features that help project managers track and mitigate potential issues. Configuring dedicated Jira plugins for optimal risk management can further enhance its effectiveness.
For example, using plugins like the SoftComply Risk Manager Plus, project managers can identify and track risks throughout the project lifecycle.
It offers templates for various risk management frameworks, making it easier to implement either industry standards like ISO 31000, PRINCE2, ISO 27001 and ISO 14971. These templates streamline the risk assessment process, focusing on specific project needs.
Advanced reports and dashboards in Jira Cloud allow for real-time monitoring of risk management performance. Customisable notifications ensure relevant stakeholders are promptly informed of any new or changing risks.
This enables a more agile response to potential issues.
Configuring Jira for Risk Management
Setting up Jira for effective risk management involves a few key steps. Below are the 8 best practices for managing project risks in Jira:
Best Practice 1 – Adding ‘Risk’ as a New Custom Issue Type
This enables you to differentiate the project risks from other project-related Epics and Tasks, etc.
You can do this by going to Project Settings, selecting Issue Types, and adding a new issue type with a name ‘Risk’.
Best Practice 2 – Adding New Custom Jira Fields for Risk Assessment
Your risk management process may require you to capture additional details about the Risks. To do that, you can configure custom fields for the essential risk details, such as select lists for Risk Category and Department, text fields to capture Summary of Mitigation Actions.
In case you are using dedicated apps for Risk Management, these will usually come with configurable fields for Impact / Likelihood / Risk Score, reducing your workload in configuration.
These additional fields will help you to create a detailed risk profile for your project.
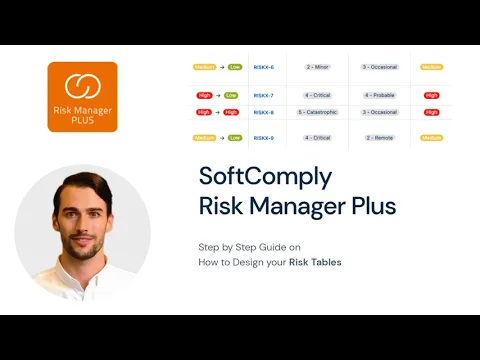
Risk Management in Jira – How to Create a Risk Table in the Risk Manager Plus app on Jira Cloud
Best Practice 3 – Prioritising Critical Risks
Visualisation tools like Jira Dashboards can present risk data in an easy-to-understand format, aiding in quick decision-making.
Setting up dashboards in Jira helps monitor risks in real-time. You can create a custom dashboard that displays key risk metrics including risk probability, impact scores, and mitigation status. Dashboards can be saved and shared with your team to make sure everyone is on the same page.
You can also make use of Dashboard gadgets available in Jira and developed by the risk management app vendors. The risk matrix gadget is great for visualising the risk distribution across your risk matrix view. Meanwhile, the risk table gadgets shows you all the information about your risks in the spreadsheet format.
By configuring these dashboards, you will be able to ensure that your team can track any risk changes. You can quickly identify which risks need immediate attention. Communication becomes streamlined since everyone can see the same data right on the dashboard.
Incorporating sprints can also help in managing risks. By addressing risks in each sprint, as part of the agile methodology, teams can continuously monitor and mitigate potential issues. Regularly updating and revisiting the risk register ensures that all risks are tracked and managed effectively.
To stay on top of potential issues, you can also use Jira filters. These filters help to quickly identify risks by sorting through various issues based on a specific criteria.
For instance, if you create a custom filter to display all ‘Risk’ issue types, you will see them all at a glance.
Best Practice 4 – Ensuring Consistency across Projects
Every company has a number of ongoing projects at any given time. To be able to compare risks across various projects, it is essential that the same risk assessment approach is used in each project.
Best Risk Management apps allow you to create centrally defined Risk Models and Risk Tables, where the input values are determined for Project Managers. If the same method is used, you can start tracking the overall risk status across your projects.
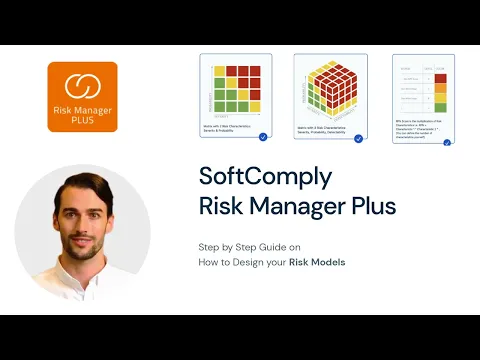
Risk Management in Jira – How to Create a Risk Model in the Risk Manager Plus
Best Practice 5 – Training and Creating Awareness
It is crucial for everyone on the project team to have a shared understanding of the Risk Management process, ensuring that the various levels of impact and likelihood are clearly defined and consistently applied.
In this context, specific Jira plugins for risk management can help your team assess project risks in a unified manner.
Best Practice 6 – Collaborating & Communicating the Mitigation Actions and their Statuses
One of Jira’s main benefits for users is collaboration – once you have identified Risks in your project, you should be linking these with actions that your team will address, called the mitigation actions. This is accomplished by using Jira issue links (e.g. ‘mitigated by’).
Linked mitigation actions provide clarity to both the Project Manager (e.g. the status of the linked issue) as well as to the team member who is working on the specific Task (the task/mitigation action that is linked to the Risk).
Additionally, you can view the Traceability of your Project Risks that include all the linked activities like ‘In Mitigation’, ‘Verified’, etc.
Best Practice 7 – Risk Reporting to Stakeholders
Generating reports for stakeholders is essential in risk management. Using Jira, you can create detailed risk reports that cover all critical aspects of risk reporting. These reports highlight risk levels, mitigation actions, and their timelines.
If your project is well structured, it is very easy to filter out Risks by their criticality and present them in Jira or any external format (e.g. Excel, Powerpoint, PDF).
Some risk management apps on Jira have dedicated Dashboard gadgets available that display the Risk Matrix. Others have dedicated Confluence macros to bring your risk reports from Jira to Confluence. The latter is particularly important when your company is using Confluence for document management.
With the SoftComply Risk Manager for Confluence Cloud, a free app, you can pull your risk reports from Jira to Confluence. You can use the SoftComply macros on a Confluence page to visualise the risk table, risk matrix or risk history reports. You can further customise the data you wish each of these reports to
Best Practice 8 – Keeping Documentation Up-to-Date
Integrating Jira with Confluence supports keeping your risk documentation up-to-date. With Confluence, you can create detailed risk management documentation that is linked directly to corresponding Jira issues. This makes it easy to access extra information like risk analysis, mitigation plans, and updates right from one platform.
Confluence templates can also be used to standardise risk documentation. You can create a risk register template where each risk entry pulls data from Jira. This keeps everything consistent and easily accessible.
Another benefit is the ability to embed Jira issues into Confluence pages. This gives a clear view of risk statuses and related tasks without needing to switch between the two tools. Learn more about this integration and its benefits at integrating Jira with Confluence.

SoftComply Risk Manager Plus Demo
Advanced Tips – Using Jira Automation for Risk Management
Using Jira automation can really level up how risks are managed in projects. You can do this by setting up automation rules to automatically update risk statuses. For example, if a risk issue reaches a certain stage, you can trigger a status change or notify the team.
Creating custom rules is another game-changer. You can customize these rules to assign new risks to specific team members or move risks to different boards based on priority levels. It’s a time-saver and ensures that risks are handled promptly.
Automation also allows you to set up alerts. For instance, if a risk hasn’t been updated in a while, an automatic reminder can be sent out. This helps keep everyone on track without having to manually chase anyone for updates. Check out more about using Jira automation for risks.
Risk Management in Jira – Automation Assistant of the SoftComply Risk Manager Plus
Recommended articles